This free protocol describes how to extract a DNA sample from cheek cells in human saliva (or more accurately, a saline mouthwash) using Bento Lab.
The protocol uses a ~0.9% saline mouthwash to extract cheek cells; a wash step to remove PCR inhibitors; and a heating step to break open cells and release the DNA.
The resulting DNA extraction is crude, unbuffered, and may contain some PCR inhibitors, but it can produce good results provided the extraction is not overloaded and the DNA is used relatively soon after extraction.
Before you start, it’s a good idea to make sure that it’s been at least 30 minutes since you last ate food, drank liquids (other than water), or brushed your teeth with toothpaste.
This will help reduce the amount of food particles, hot or cold drinks, or toothpaste, in your mouthwash sample.
Preparing the Sample Tubes
You will use 1.5 mL tubes to extract the DNA samples from your cheek cells.
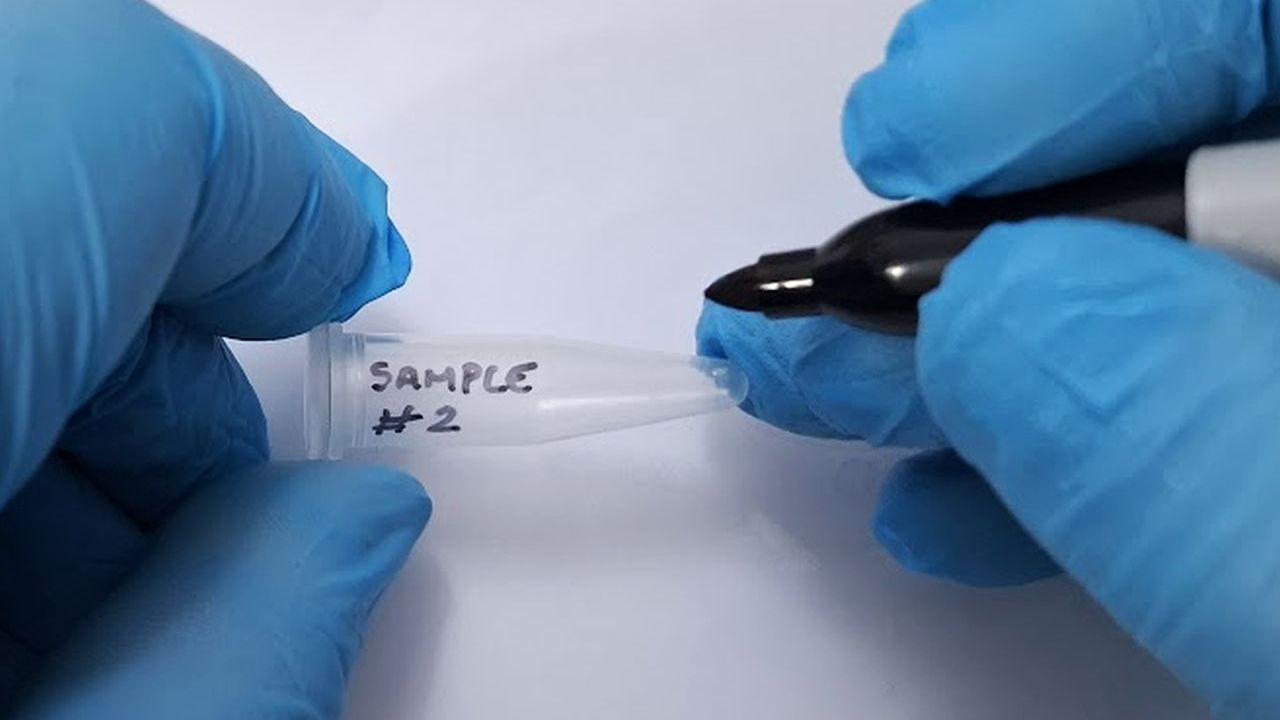
To start, prepare each tube by labelling them with a permanent marker.
It’s good practice to label the tube clearly even if you only have one sample. If the sample is from a person you could use their initials as a sample code. It’s also a good idea to mark the date of the sample.
Preparing Saline Solution
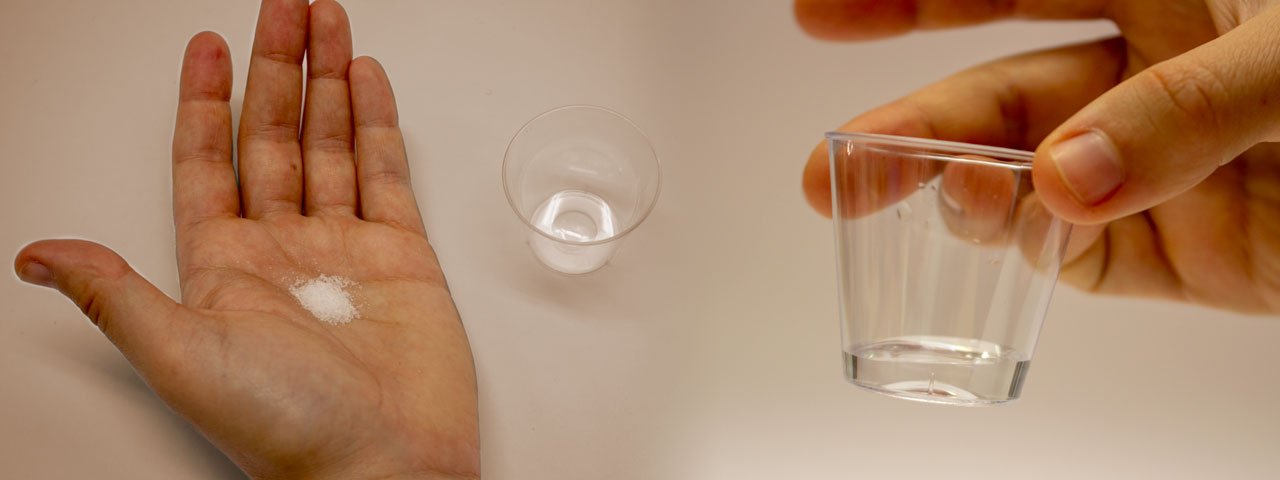
You will need salt water (saline solution) as a mouthwash to collect your cheek cells.
In a small glass or similar, mix a pinch of table salt (approximately 0.3 g) with approximately 33 mL tap or bottled water. A large shot glass (35 mL or 50 mL) is perfect for this. This will produce an approximately 0.9% saline solution.
For best accuracy weigh the salt and/or water with digital weighing scales: add 0.9 g of salt to 100 g of water, or 4.5 g of salt to a 500 mL bottle of water.
Why the salt water? In this protocol, the aim is to get a sample of DNA from cheek cells. The 0.9% saline mouthwash is isotonic (having the same osmotic pressure as cells and blood), which protects the cells during mouthwashing and sample washing. The salt also helps to protect the DNA (to some extent) after it is extracted by heating and centrifuging the sample.
Rinsing your mouth
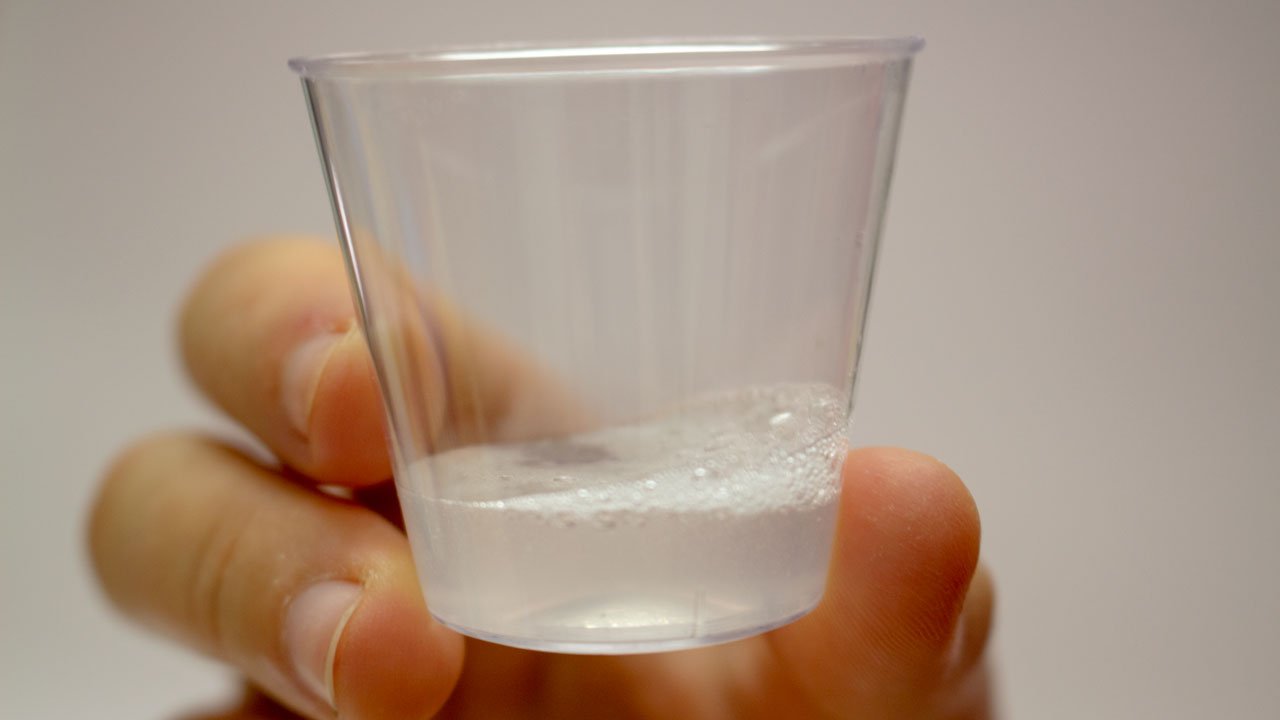
Measure approximately 10 mL salt water into a shot glass, and pour this into your mouth. Rinse your inner cheeks vigorously for 60 seconds, swishing the water from side to side and rubbing your cheeks against your teeth to dislodge cheek cells.
When you are done, spit the saline solution back into the glass.
The goal of this step is to loosen as many cells from your mouth as possible. You can use your teeth to gently scrape your cheeks and tongue while you are swirling the salt water around in your mouth. You can also touch your inner cheeks with your tongue. Careful to not hurt yourself – there’s no need for blood, just saliva with lots of cheek cells.
Transferring your sample into the microcentrifuge tube
For this step, you will use your saliva sample (1), the microcentrifuge tube you labelled in the beginning (2), and a transfer pipette (3).
Use the transfer pipette to transfer your saliva sample into the microcentrifuge tube. Fill it up to the 1 mL mark.
If in later steps you find your pellets are too small, you can increase the volume of mouthwash added to 1.5 mL to capture more material. Similarly, if your cell pellets are extremely large you can reduce the volume below 1 mL to capture less material.
Centrifuging your sample to form a cell pellet
It is time to use the centrifuge. This will use gravitational force to force the cells in the sample into a solid pellet at the bottom of the sample tube.
Put the centrifuge tube with your saliva sample into the centrifuge. Make sure to balance the centrifuge with another sample or with another counter weight.
If you only have one sample, the easiest way to balance the centrifuge is to fill another tube with water and use it as a balancing tube.
Using the centrifuge in an unbalanced way is dangerous and will break the device. Follow our tips for balancing a centrifuge in the manual here. In this case, for example, you could either use a second sample as a counter balance or fill up another tube with water. Tubes must always be balanced with another tube of equal weight.
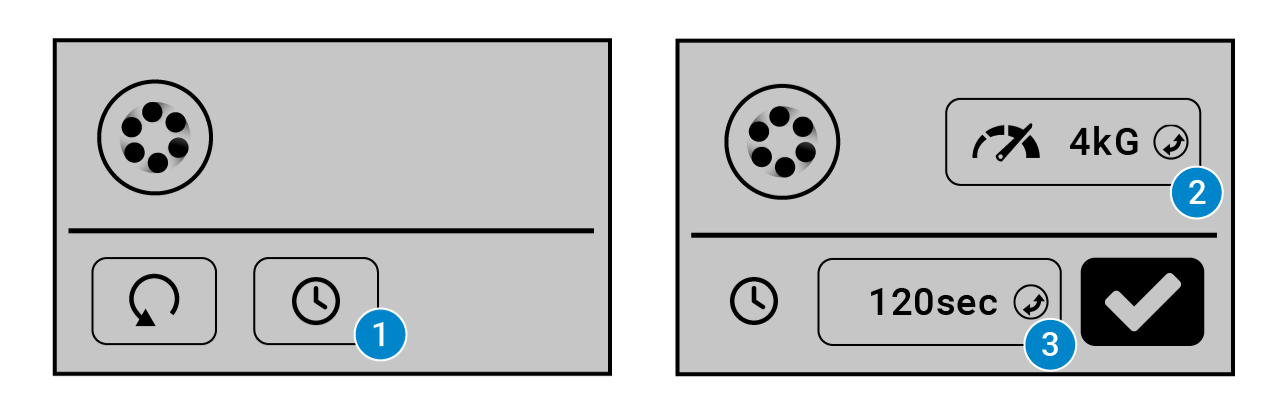
Once the sample tube is balanced in the centrifuge rotor, close the lid and activate the centrifuge module. If you are using Bento Lab Pro, set the speed to 4k ×G and spin for 120 seconds. If you’re using Bento Lab Entry, spin for 5 min (at 2.7k ×G).
If you need help operating the Bento Lab centrifuge, check the user manual. Once the lid is closed, select the time mode (1). Set the force (2) and time (3) before confirming.
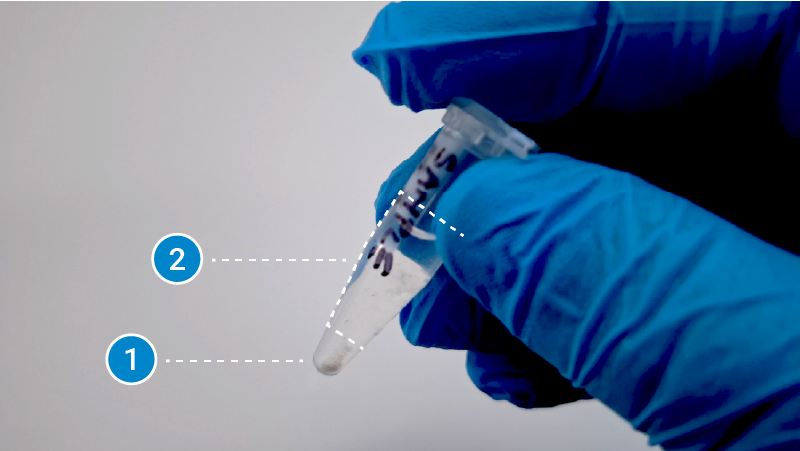
Check the sample tube after centrifugation has finished. All the cheek cells should now be concentrated in a small white ball at the bottom of the tube (1). This is called a pellet. The remaining liquid (2), called the supernatant, should be clear.
You do not need a large pellet to extract enough DNA for PCR — a small but visible pellet that’s mainly composed of cheek cells is much better than a large pellet full of food particles or plaque.
But if your pellet is not visible or is extremely small, then you may not have enough cheek cells to get a concentrated DNA sample. In that case, continue to the next step to recover any pellet present, and then go back to Step 5 to add more mouthwash to the same tube, and centrifuge again.
Recovering the Pellet
In this step, you will remove the supernatant so that only the white cell pellet remains.
First, check that your pellet is firmly attached to the bottom of the tube. If the pellet is loose, try centrifuging again until it is firmly attached.
If the pellet is attached, carefully pour the supernatant away into a waste container. Don’t use your 0.9% saline solution container for this because you’ll need it for later steps.
If some supernatant remains, use the transfer pipette (or a micropipette) to remove it, being careful not to disrupt the pellet. A small amount of supernatant can be left if it is too difficult to remove.
Be careful not to lose the pellet when pouring out the supernatant! If you do lose it, go back to Step 5, refill the same tube with moutwash, and centrifuge again to form a new pellet.
Washing the pellet
Once you have a large enough pellet, you will need to wash it to help remove some of the components of saliva that could inhibit PCR.
To do this, add 1 mL of 0.9% saline solution to the tube with a clean transfer pipette (up to the 1 mL line of the tube).
Make sure the tube is closed, and then break up the pellet by flicking the tube.
Once the pellet has been broken up and dispersed, the cells from the sample will have been washed, and are now resuspended in the liquid.
Recovering the washed cells
To recover the washed cells, you now need to centrifuge the sample tube again to reform a pellet, and then remove the supernatant.
As before, put the centrifuge tube with your saliva sample into the centrifuge. Make sure to balance the centrifuge with another sample or with another counter weight. If you only have one sample, reuse the water-filled balancing tube you used in the previous centrifugation step.
Once the sample tube is balanced in the centrifuge rotor, close the lid and activate the centrifuge module. If you are using Bento Lab Pro, set the speed to 4k ×G and spin for 90 seconds. If you’re using Bento Lab Entry, spin for 5 min (at 2.7k ×G).
Once you have finished centrifuging the sample, check the bottom of the sample tube to ensure that the pellet has reformed and is stuck to the bottom of the tube.
Then, as before, carefully remove as much liquid as you can from the sample tube by pouring into a waste container.
If a large amount of liquid is left after pouring, use the transfer pipette (or a micropipette) to remove the liquid without disturbing the pellet. Remove as much liquid as you can to help get as clean a sample as possible.
I the pellet is not firmly attached to the bottom of the tube, try spinning the sample again in the centrifuge.
Resuspending the washed cells
You should now have a washed pellet in no or very little liquid.
The next step is to resuspend the pellet in fresh 0.9% saline solution for the DNA extraction step.
To do this, use the transfer pipette to transfer approximately 100 μL of fresh 0.9% saline into the sample tube. You can estimate this volume using the graduations on the side of the transfer pipette, and also the 0.1 mL line on the side of the 1.5 mL sample tube. Add the saline solution carefully in small drops to avoid adding too much.
Once you have added the fresh saline, close the tube lid, and resuspend the pellet in the saline solution by flicking the bottom of the tube until it is entirely broken up and dispersed into solution.
If you find it difficult to see the graduations on the sides of the transfer pipette and 1.5 mL centrifuge tube, you can mark these with a permanent marker to make them easier to see when pipetting.
You can also use a micropipette for the pipetting step if you prefer.
Transferring the sample into a PCR tube for extraction
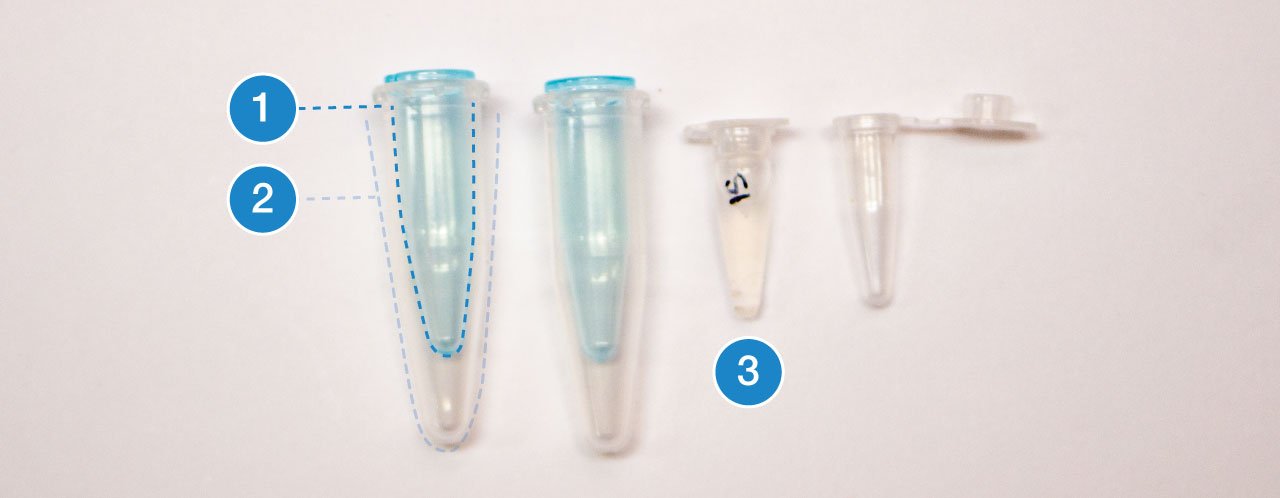
In this next step, you will use the micropipette (1) to transfer the resuspended sample (2) into a 0.2 mL PCR tube (3), so that you can heat it in the thermocycler.
First, set the adjustable pipette to the maximum volume of 20 μL.
Make sure the pipette has a new pipette tip. Then use the pipette to transfer the cell mixture of the sample to the 0.2 mL PCR tube, pipetting 20 μL five times to make 100 μL.
If you have a 200 μL pipette, use it instead of a 20 μL pipette: set it for 100 μL and pipette all of the supernatant in a single pipetting action.
Labelling the PCR Tube
Finally, click the lid of the PCR tube closed and label the tube to identify the sample, similarly to the centrifuge tube.
Label the side of PCR tubes, not the lid. The PCR machine has a heated lid, so any ink on the tube lid might come off.
Heating the sample
In this step, you will use the thermocycler as a heat block to boil the cells and burst them open, to release the DNA into the solution.
Place your PCR tube with your sample cell solution in the thermocycler block.
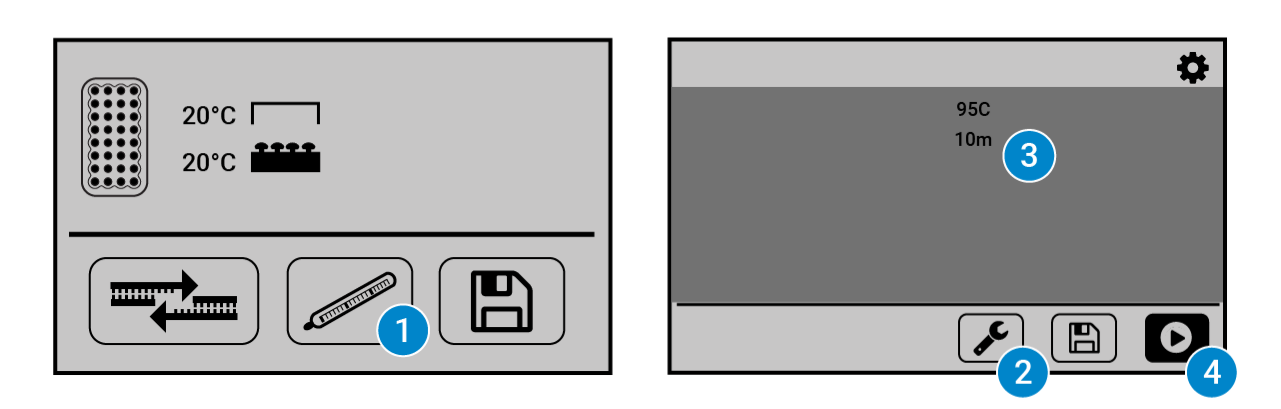
Set up the thermocycler to heat the sample at 95°C for 10 minutes.
If you need help operating the Bento Lab thermocycler, check the manual. You can use the heat block preset (1), then modify (2) the program to the required settings (3) before running the program (4).You can also save the program using the floppy disk icon.
Mixing the Sample
After heating the sample for 10 min, we will prepare it again for centrifugation.
First, take the PCR tube out of the thermocycler block.
The block and the heated lid will still be hot, so take extra care.
Flick the PCR tube for 5–10 seconds to mix the sample.
Centrifuging the sample
In this step, you will spin the sample to separate the supernatant from the cell debris. Now the cells have burst thanks to the heating step, the DNA will be released from the cells and floating in the supernatant.
The molecular weight of DNA is lighter than the other cell material, like proteins and cell walls. By spinning the sample with the centrifuge we separate the cell material from the DNA, which gives us a cleaner DNA sample.
To spin the PCR tube with your sample (3) in the Bento Lab’s microcentrifuge, you will need to use the PCR tube adapter (1) that sits in a normal microcentrifuge tube (2) and converts it to fit a PCR tube.
Remember to balance your centrifuge. So, if you are only working with one sample, prepare another PCR tube with an amount of water equivalent to your sample.
If using Bento Lab Pro, set the centrifuge to run for 120 seconds at 4k ×G. If you’re using Bento Lab Entry, spin for 5 min (at 2.7k ×G).
If you need help operating the Bento Lab centrifuge, check the user manual. Once you the lid is closed, select the time mode (1). Set the force (2) and time (3) before confirming.
Cleaning up the sample for storage
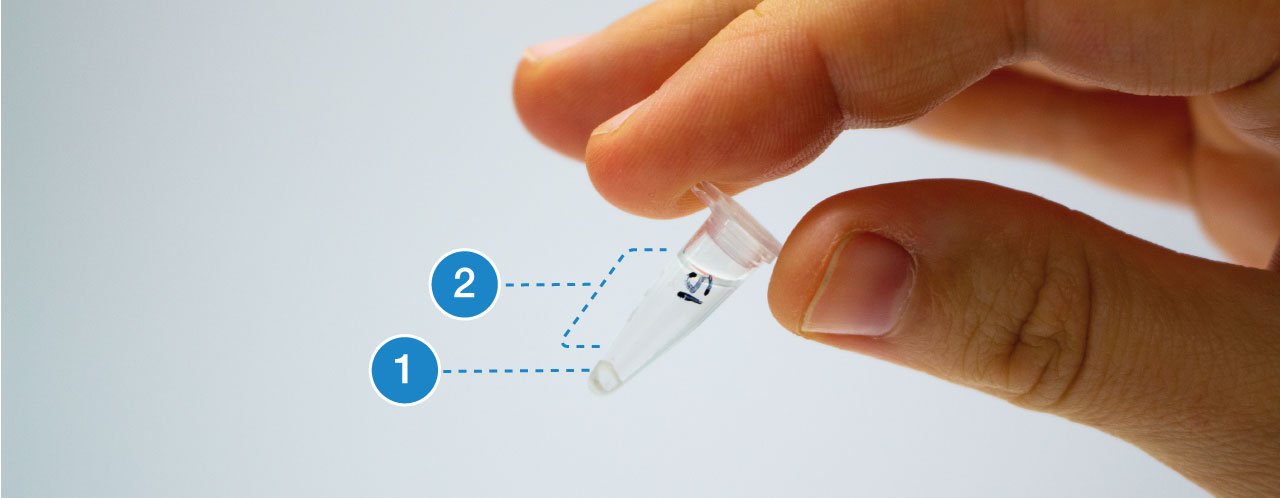
After centrifugation, all the cell debris has been forced to the bottom of the PCR tube (1), leaving only the DNA in the liquid supernatant (2). The supernatant should look clear, like water.
Finally, you will transfer the supernatant into a new PCR tube using the micropipette.
Set the micropipette to 20 μL and put on a new tip. Transfer 40 μL of the clear supernatant into the new PCR tube.
Be careful to avoid pipetting any cell debris into the new tube. You should only transfer the clear liquid supernatant. Avoiding any of the cell debris will reduce the chance of interference with the DNA sample.
Labeling and storage
The new tube now contains only the DNA in the liquid. It is called the template sample, and can now be further used for analysis using protocols like PCR.
Label the tube again, so that you can identify which template sample it is.
For best results, use the DNA extraction for PCR as soon as possible. If this is not possible, store it in the freezer at around -20°C. This will help preserve the sample.
Although double stranded DNA itself is very stable, the DNA in crude extractions is usually highly fragmented and single stranded. There may also still be some other proteins in the sample that will degrade it over time. The purpose of the wash steps in this protocol is to clean up the saliva sample as much as possible whilst retaining the DNA, although this is only a partial solution. Storing the sample in the freezer will also slow down any reactions from left-over proteins, and therefore the template DNA sample will be preserved for longer.