You will use 0.2 mL PCR tubes to extract the DNA from your samples.
To start, prepare each tube by labelling them with a permanent marker.
Label the top half of PCR tubes, not the lid. The PCR machine has a heated lid, so any ink on the tube lid might come off.
Even if you only have one sample, it’s good practice to label the tube clearly. For example, if the sample is from a person, you could use their initials. It’s also a good idea to mark the date of the sample.
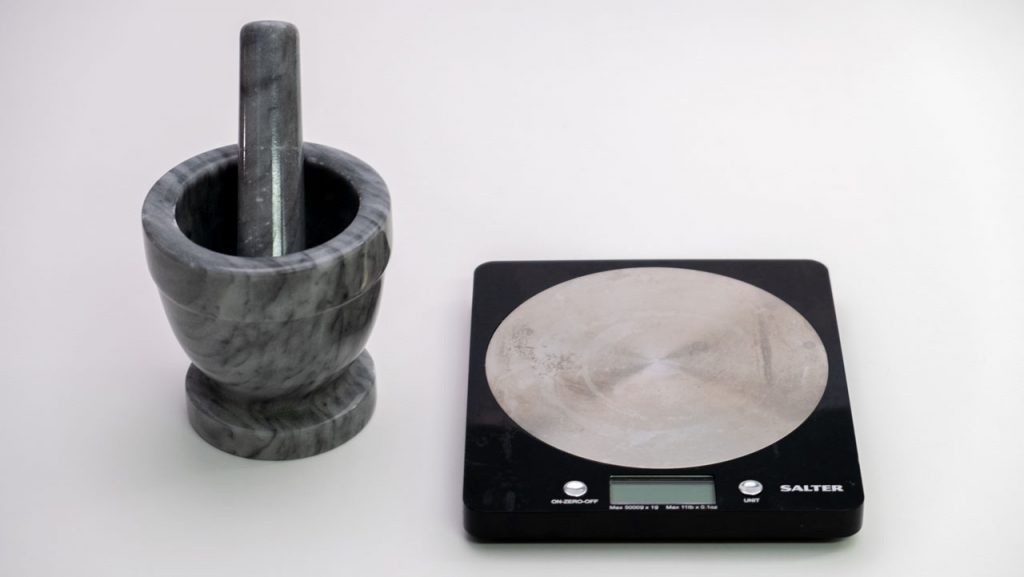
Weigh your sample
Weigh out 0.5–2 g of your food sample and put your sample into the mortar.
If you don’t have a pestle and mortar, you could use a bowl and the back of a spoon.
Grind your sample and add water
The objective of this step is to break up the cells, and create a soft mix you can pipette into the PCR tube.
Grind your sample with a pestle.
Add around 5 ml of distilled water for every gram of food. Grind the sample for at least 2 min until it forms a slurry you can pipette into the PCR tube.
Transfer your sample into the PCR tube
Using a transfer pipette, pipette the ground sample mixture into a PCR tube until full.
If there are air bubbles int he tube, tap it hard against the table surface to move the sample down. Then fill up the remaining tube.
Heating the sample
In this step, you will use the thermocycler as a heat block to boil the cells and burst them open, to release the DNA into the solution.
Place your PCR tube with your sample cell solution in the thermocycler block.
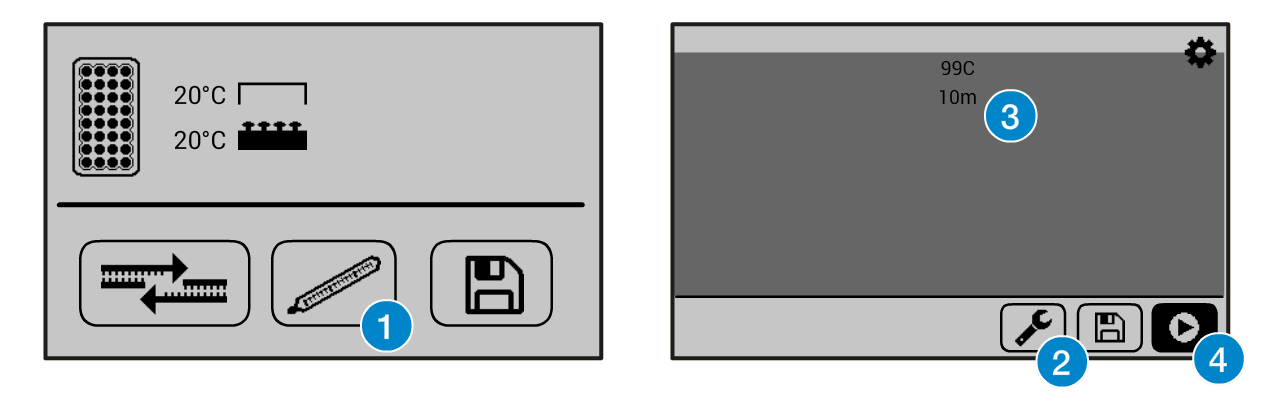
Set up the thermocycler to heat the sample at 99°C for 10 minutes.
If you need help operating the Bento Lab thermocycler, check the manual. You can use the heat block preset (1), then modify (2) the program to the required settings (3) before running the program (4).
Mixing the Sample
After heating the sample for 10 min, we will prepare it again for centrifugation.
First, take the PCR tube out of the thermocycler block.
The block and the heated lid will still be hot, so take extra care.
Flick the PCR tube for 5 seconds to mix the sample.
Centrifuging the sample
In this step, you will spin the sample to separate the supernatant from the cell debris. Now the cells have burst thanks to the heating step, the DNA will be released from the cells and floating in the supernatant.
The molecular weight of DNA is lighter than the other cell material, like proteins and cell walls. By spinning the sample with centrifuge, we seperate the cell material from the DNA, which gives us a cleaner DNA sample.
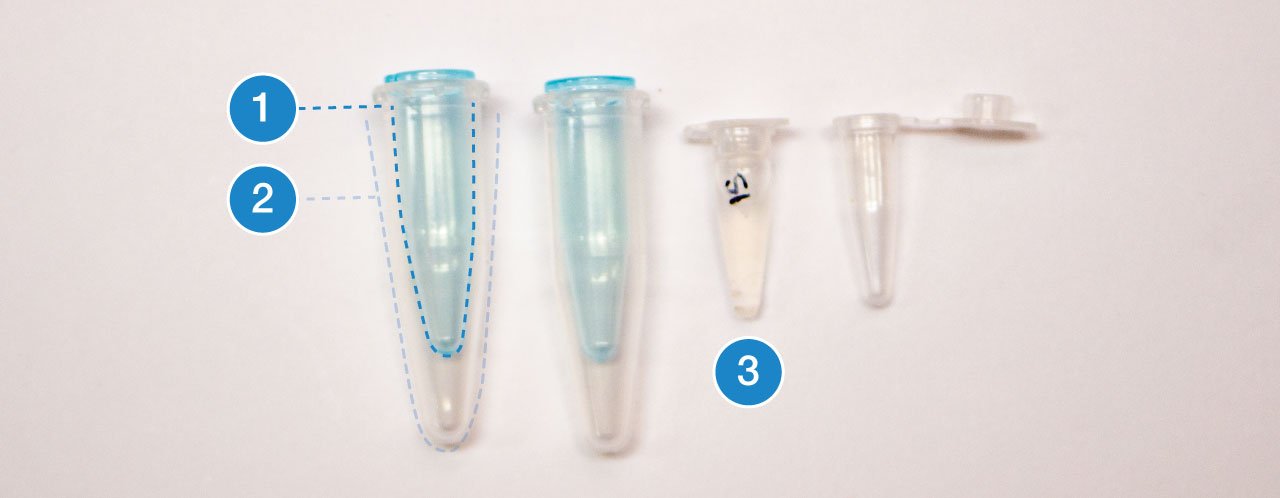
To spin the PCR tube with your sample (3) in the Bento Lab’s microcentrifuge, you will need to use the PCR tube adapter (1) that sits in a normal microcentrifuge tube (2) and converts it to fit a PCR tube.
Remember to balance your centrifuge. So, if you are only working with one sample, prepare another PCR tube with an amount of water equivalent to your sample.
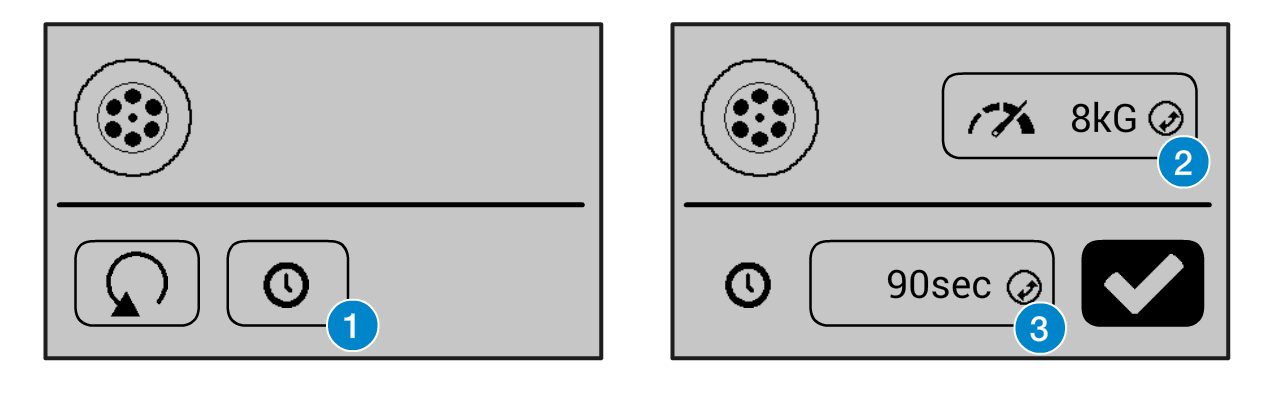
Set the centrifuge to run for 90 seconds at 8kG.
If you need help operating the Bento Lab centrifuge, check the user manual. Once you the lid is closed, select the time mode (1). Set the force (2) and time (3) before confirming.
Cleaning up the sample for storage
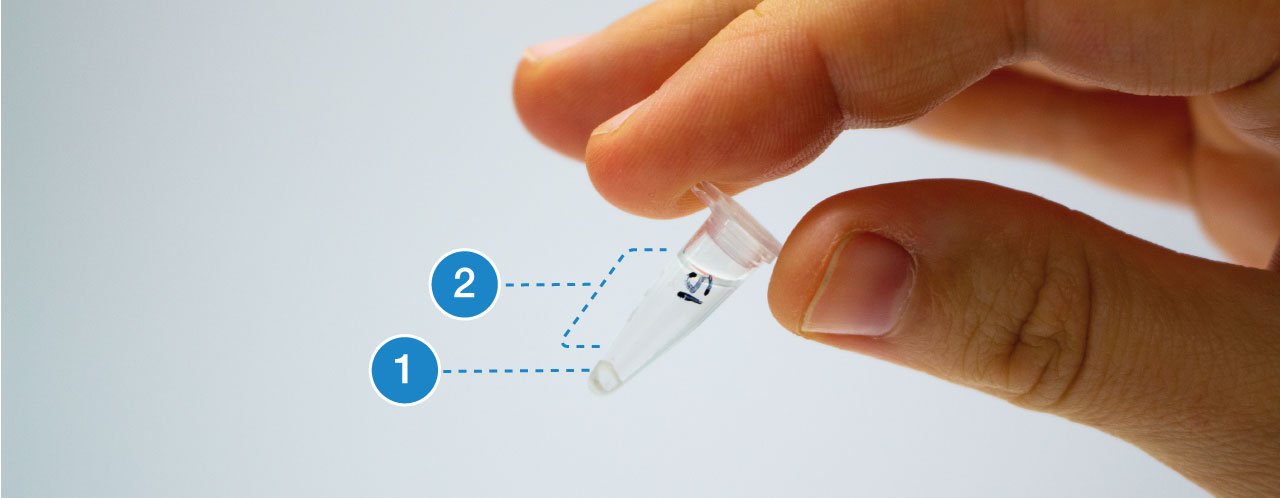
After centrifugation, all the cell debris has been forced to the bottom of the PCR tube (1), leaving only the DNA in the liquid supernatant (2). The supernatant should look clear, like water.
Finally, you will transfer the supernatant into a new PCR using the micropipette.
Set the micropipette to 20μL and put on a new tip. Transfer 40μL of the clear supernatant into the new PCR tube.
Be careful to avoid pipetting any cell debris into the new tube. You should only transfer the clear liquid supernatant. Avoiding any of the cell debris will reduce the chance of interference with the DNA sample.
Labeling and storage
The new tube now contains only the DNA in the liquid. It is called the template sample, and can now be further used for analysis using protocols like PCR.
Label the tube again, so that you can identify which template sample it is.
Finally, if you are not using the template sample in another protocol right away, store it in the freezer at around -20°C. This will preserve the sample.
Although DNA itself is very stable, there might still be some other proteins in the sample that will degrade it over time. The purpose of this protocol is to clean up the saliva sample as much as possible whilst retaining the DNA. Storing the sample in the freezer will slow down any reactions from left over proteins and therefore the template DNA sample will be preserved longer.
Welcome to our community.
Get our monthly biotech tips in your inbox, and we’ll send you a code for $10 off your next order.